By Nick Simonson
“Go down…go down…go down…go down…”
 Audibly from my stand, I urged the buck to tumble in the open field, and at the south end of it, it almost looked like he was ready to as his sprint slowed to a stumble-run. The shot from my bow was a resounding “thwack” that left me confident I’d find my first arrowed deer somewhere in the brush at the end of the field. But what sounded good would result in a long night of tracing a fast-disappearing blood trail from one shore of a small river to the other and a following-day search that led to nothing more than an early completion of my daily 10,000 recommended steps. The frustration from the long and unsuccessful end of this weekend’s hunt did however bring with it several lessons in tracking a wounded deer and reminded me of how important it is to have a few handy tools stashed at the ready for such a follow-up adventure.
Main Light
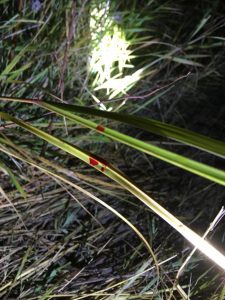
As many large deer begin their movements at dusk and present the only shot of the day as the sun sets, a powerful beam will help you find their trail and tracks in the dark. Strong multi-hundred lumen-rated lights will dispense enough illumination to follow prints in the mud or dirt and pick out the bright red droplets of blood on the trail of a wounded deer. Additionally, they provide the light necessary to navigate the twisting, tangled paths that many deer take to areas of dense cover where they will bed down and eventually expire. Look for lights rated at or above 200 lumens. When comparing with older flashlight models that used candlepower ratings, remember the lumen to candlepower ratio is about 12.5:1, to know how strong the beam will be. Obviously, the higher the rating, the brighter and better the light will be for tracking.
Marking Tape
Bright, non-stick marking tape in pink, orange or chartreuse can be tied to branches, twigs or other areas to mark the trail of a wounded deer. Simply tear or snip off a small ribbon and attach it to a plant, sapling or stick on the next point of blood, prints or other indicia on the path, and refer to it as you explore ahead for the next sign of your quarry. Remember to tie it tight in case you bump the deer from its resting spot or need to return later to continue the efforts, or weather patterns shift and wind picks up.
Drop Lights
With the proliferation of low-cost LED lighting technology, a number of inexpensive taplights can be stashed in a small case, ready for deployment in the dark. Use them to mark trails at night at major junctions, sites of significant blood or other sign, and to serve as a reference point that can be easily seen from a distance. Just remember to pick them up when the efforts conclude. Don’t forget extra batteries for these beacons and for main light sources.
Map & Contact
Whether on a GPS or in printed format, it’s good to have a map of the hunting area handy for quick reference. Add in a page with topographical features to trace ridges, ravines, creeks and fields that steer deer movement to provide greater insight to potential travel routes after the shot. Add in contact information for surrounding landowners (where needed in certain jurisdictions) to get permission to enter their lands while trailing a deer. Make lots of notes as each season progresses as to paths, resting sites and feeding places as many deer will utilize trails, bedding areas and similar locations in times of stress. The knowledge of these locales will help provide a base for the tracking process.
Having these items will make any tracking process easier, so stash them all in a case that is ready for deployment once hunting season starts and kept in a vehicle or the deer shack in a well-known location. While the follow-up effort after each shot might not all turn out the same way – some will be easy, some will be challenging, some disappointing and some sensational – each experience will make for better future efforts and having the right gear will help you find the end of the trail…in our outdoors.
